
Now, that rear tire is the flat one. It has a full chain case and internal hub and fenders... so he can't repair it without removing the wheel. Right? Wrong! Not only could he do it, Todd took pictures for all of us to learn from.

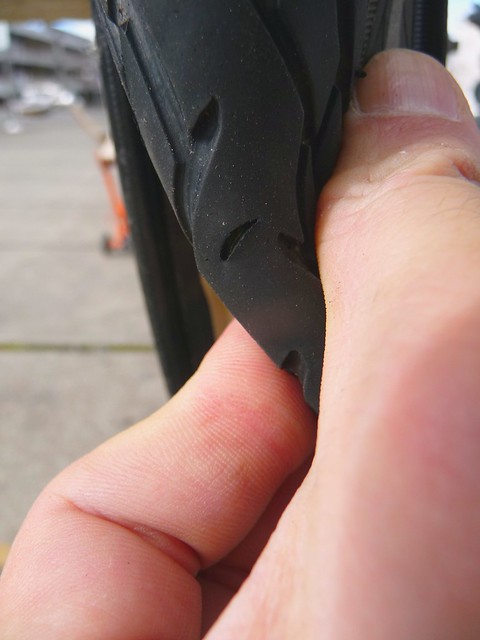
"See how the center double stand holds the rear wheel off the ground? This makes it super easy to work on said wheel. No center stand? Lay the bike on it's side. Insert tire lever under bead to pry tire off. Note dog turd in background: more center stand win."
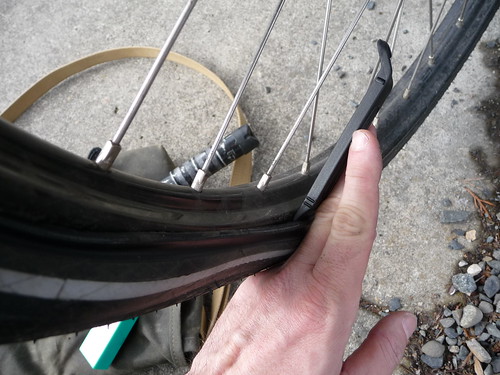
"Prying off the tire bead."

"Since I didn't find glass/nail/staple/tack or other obvious culprit stuck in the tire casing, I fished out the whole tube. If I had found the culprit, I'd have needed only to remove the underlying section of tube."

"Lightly pumping up the tube creates a hiss whose source I found here. Smaller holes harder to find. Pump more and hold close to sensitive skin/ear."

Abrade well around hole. Idea is to expose clean, black, non-oxidized rubber for the vulcanizing fluid to react with over the whole patch area. Mold seams must go. Lots of people don't abrade enough, then say that patches don't work
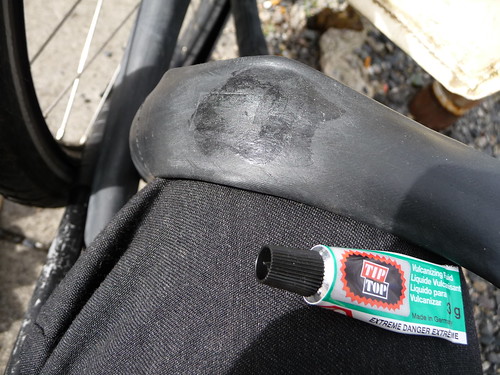
"Apply THIN layer of vulcanizing fluid, a little larger than the patch. Tip from Joe Breeze: use the crimped edge of the fluid tube as a squeegee to remove all but a film of the fluid. More fluid is not better. press all the air out of the fluid tube before you re-cap it so it won't dry out. no sniffing!"
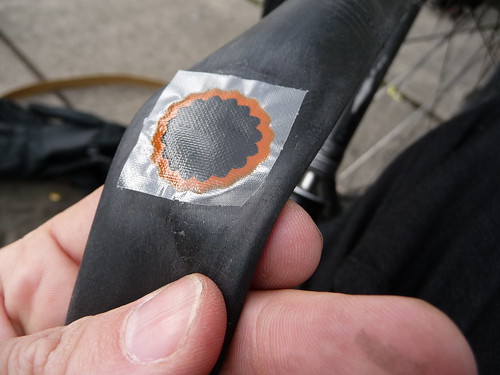
"After waiting until the vulcanizing fluid is DRY (about 5 minutes), apply the patch, center to center. The fluid is not a glue (which bonds when wet), but a surface preparation that is complete when dry. Press well. I leave the plastic backing on so the prepped part of the tube won't bind to the tire casing, and so the patch doesn't stretch with the rest of the tube, possibly stressing the repair. And because I'm lazy.
This is the 4th patch on this particular tube. Very serious time and money savings over paying a shop to replace the tube ever dang time! Replace the tube when there's no more room for patches. The Dunlop valve favored in the Netherlands remains popular there because the valve seal can be replaced independently of the tube, again without removing the wheel, so a tube's life can extend to decades."
"The location of the puncture in the tube tipped me off to the location of the hole in the tire. Looks like glass cut, then fell out. It is important always to figure out what caused the puncture and assess whether it's still a problem, or it will likely just go flat again."
"Patched and pumped. Ready to roll"

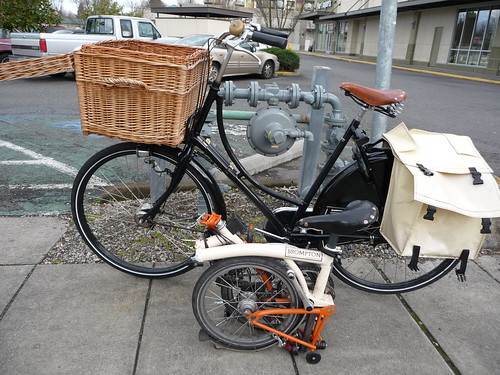
"Brommie fits in basket. Do you have a bike small enough for your basket, or a basket big enough for your bike?
And then we rode to work."
While it may take a little practice, you too can repair your flat tires! Now, if you want to take the whole thing to the next level and then carry your Brompton home on your front rack, I suggest you talk to Todd. He is the Brompton King.
Thank you so much for letting us share, Todd!! I hope to see you soon!


Wow, fantastic! I just purchased an Oma from Clever Cycles, due to arrive at my house in Buffalo in a few days. I was a bit concerned about how difficult it is to remove the rear tire in case of flats, so it was very helpful to me to see this step-by-step on how to patch the tube without removing everything.
ReplyDeleteI covet a Brompton, we're not alowed to take bicycles on the trains here for most of the day which is a major drag
ReplyDeleteThanks for this exellent tutorial! Knock on wood, my Oma has never gotten a flat tire in all these 3 years, but I will pass this info on to Mr. Dottie just in case.
ReplyDeleteSweet tutorial. I have patched tubes that way for years. Even taught a few people how to do it (they all thought I was nuts when I told them not to bother taking the wheel off)
ReplyDeleteCan't say I have a bike that will fit in the basket...yet.
Aaron
Great tutorial. Informative and entertaining at the same time.
ReplyDeleteOr do what the Dutch do: take it to a nearby bike shop and have a repairman fix it for you.
ReplyDelete